
First of all, thank you for choosing Jaltest! Now that you are a customer, lets follow these steps to complete the set up and start using your diagnostics tool!
We know that sometimes inconveniences can arise. Therefore, we have created this step-by-step guide to install Jaltest as quickly as possible. You just have to follow the steps mentioned, we have included images to facilitate solving the problem.
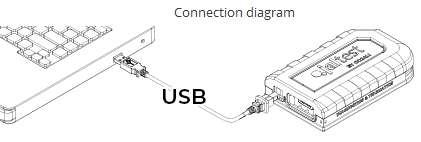
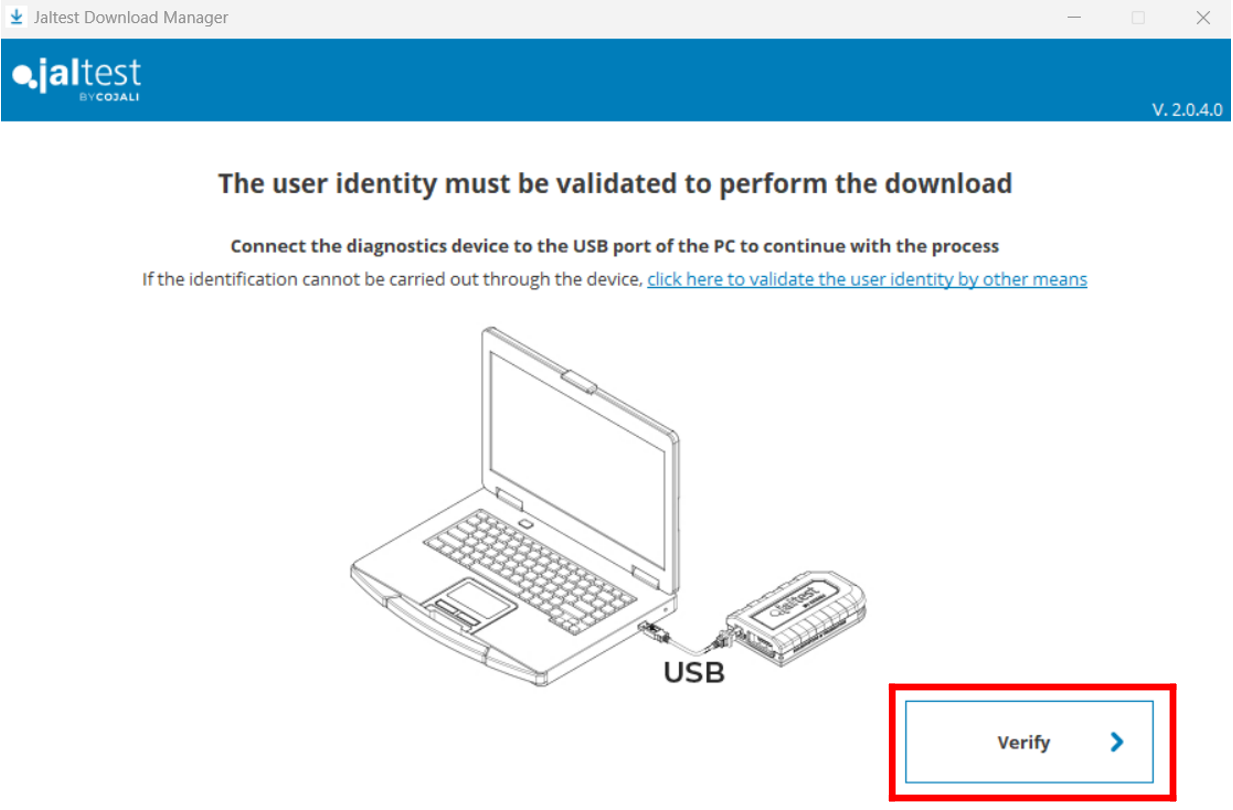
A. You need to have a connection to the internet and a Jaltest link plugged in by USB to the computer.
B. If you need to check the laptop requirements to install Jaltest software, follow the link below:
Follow these steps:
1. You need to create your Jaltest account on Jaltest.com:

- Complete the registration form, and fill out all the necessary information.
- Set up a password for your new account.
- Accept the terms and conditions and click "Send"
- You will receive an email to activate your new account to the email used in the registration, please activate it by clicking on the email.
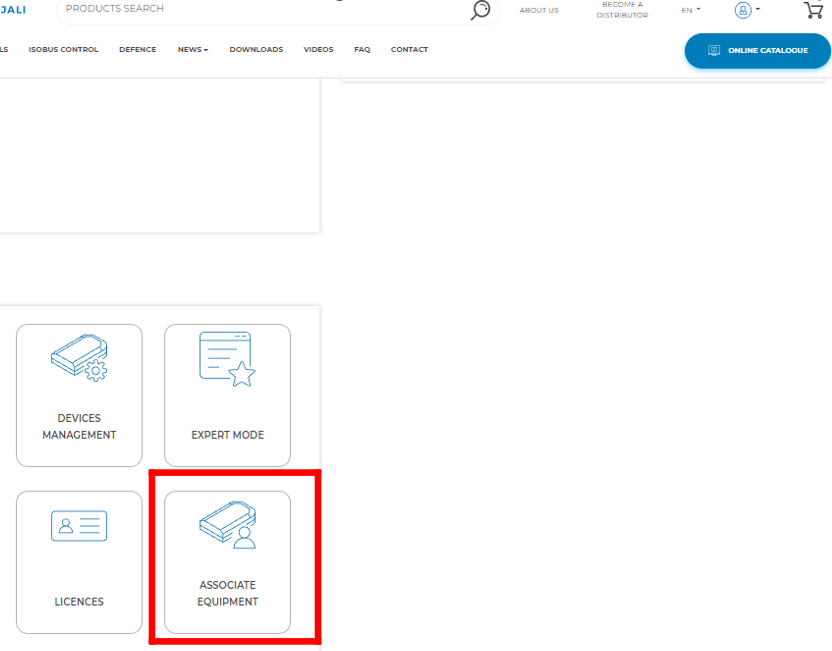
2. Once you have completed this, log in to your Jaltest account.
- Go to "Associate Equipment"
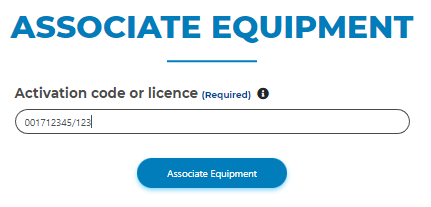
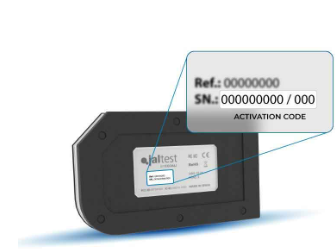
- Type in your serial number and activation code from the back of the device and click "Associate Equipment". See the picture below:
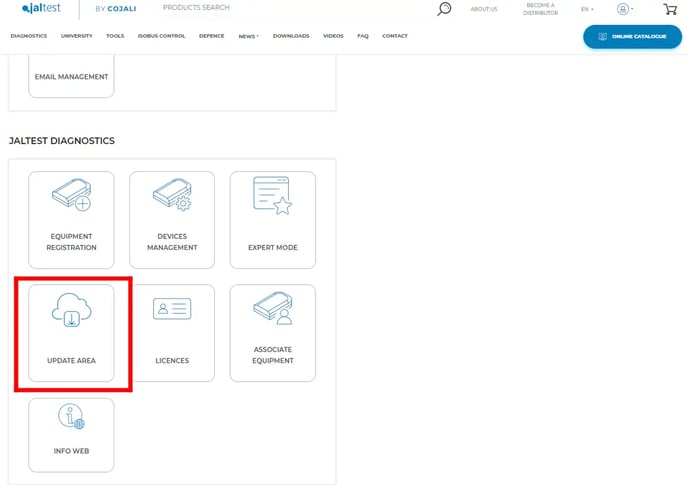
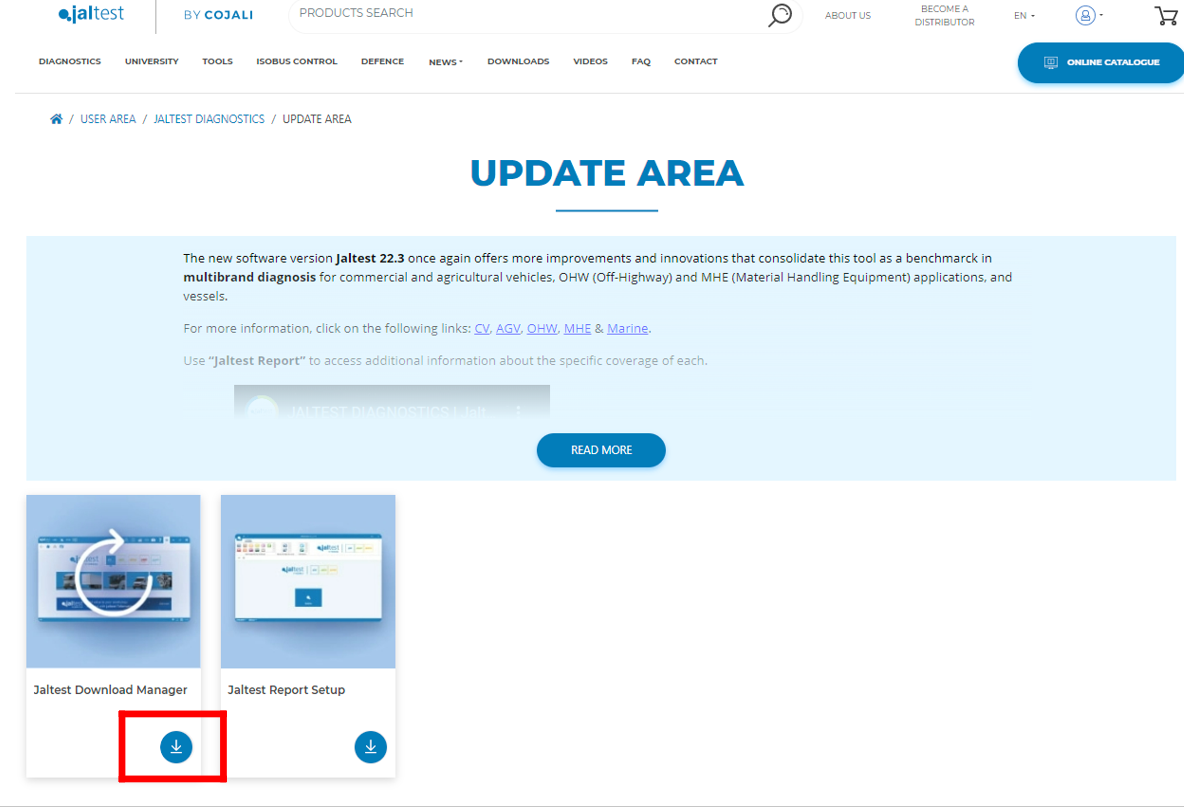
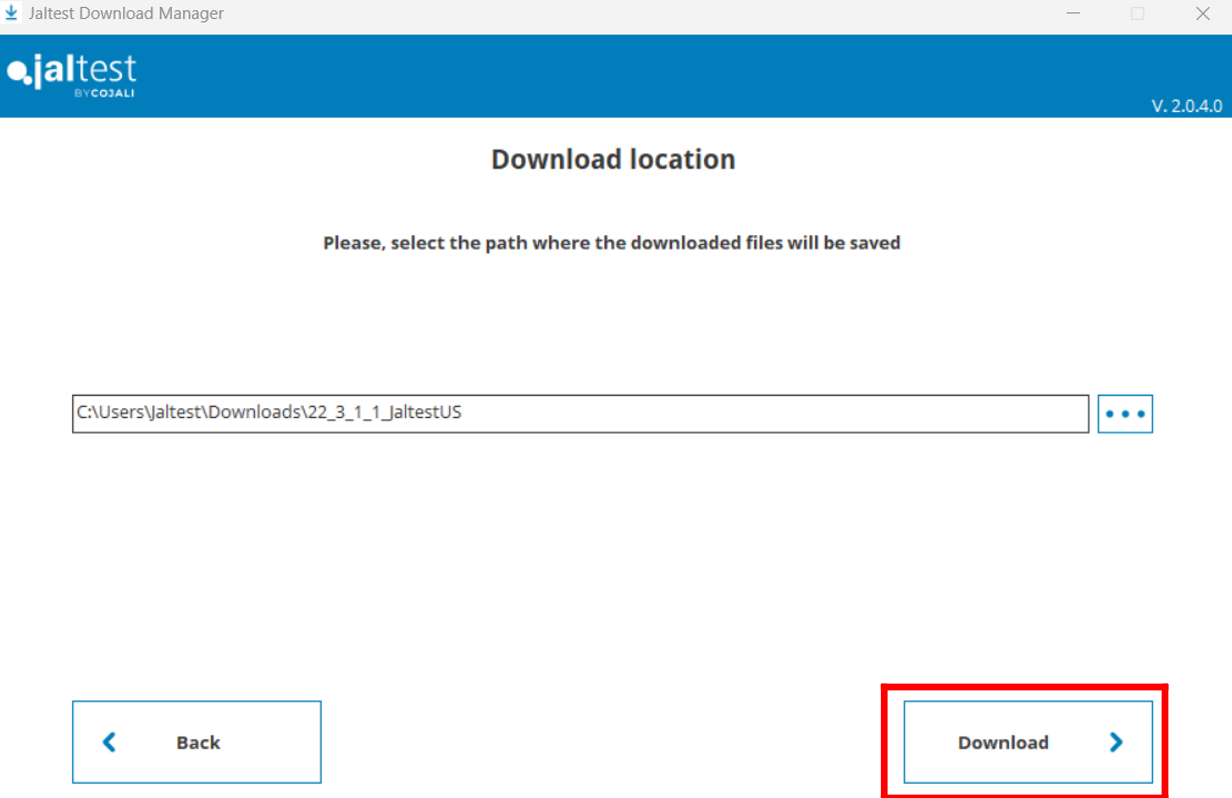
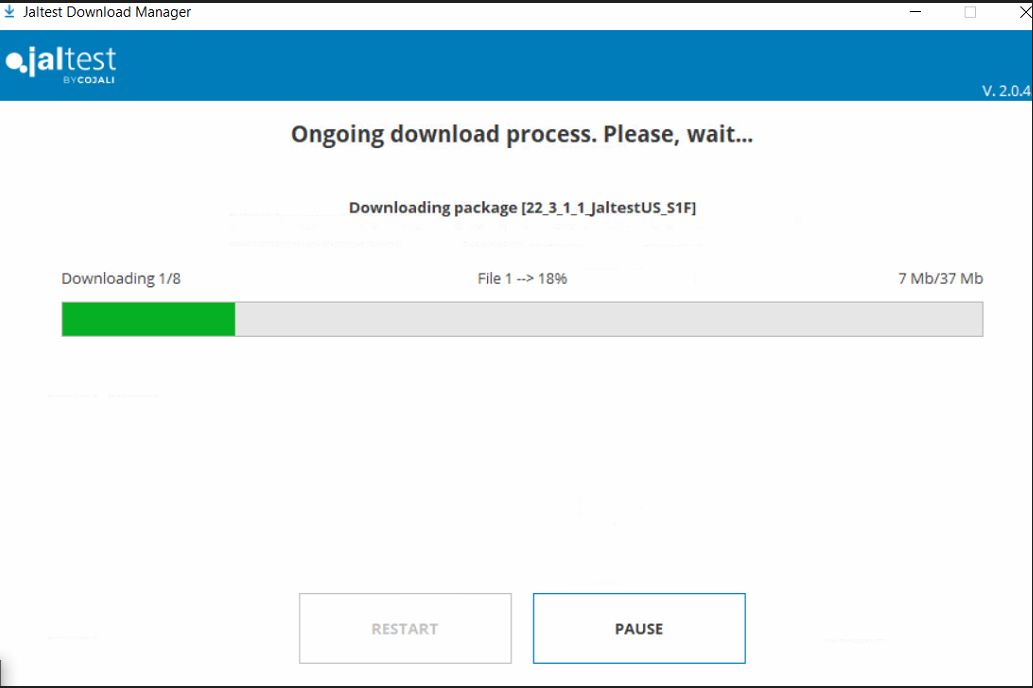
3. Once you have associated your unit to the account, you need to download the software in the "Update Area" by clicking on "Jaltest Download Manager".
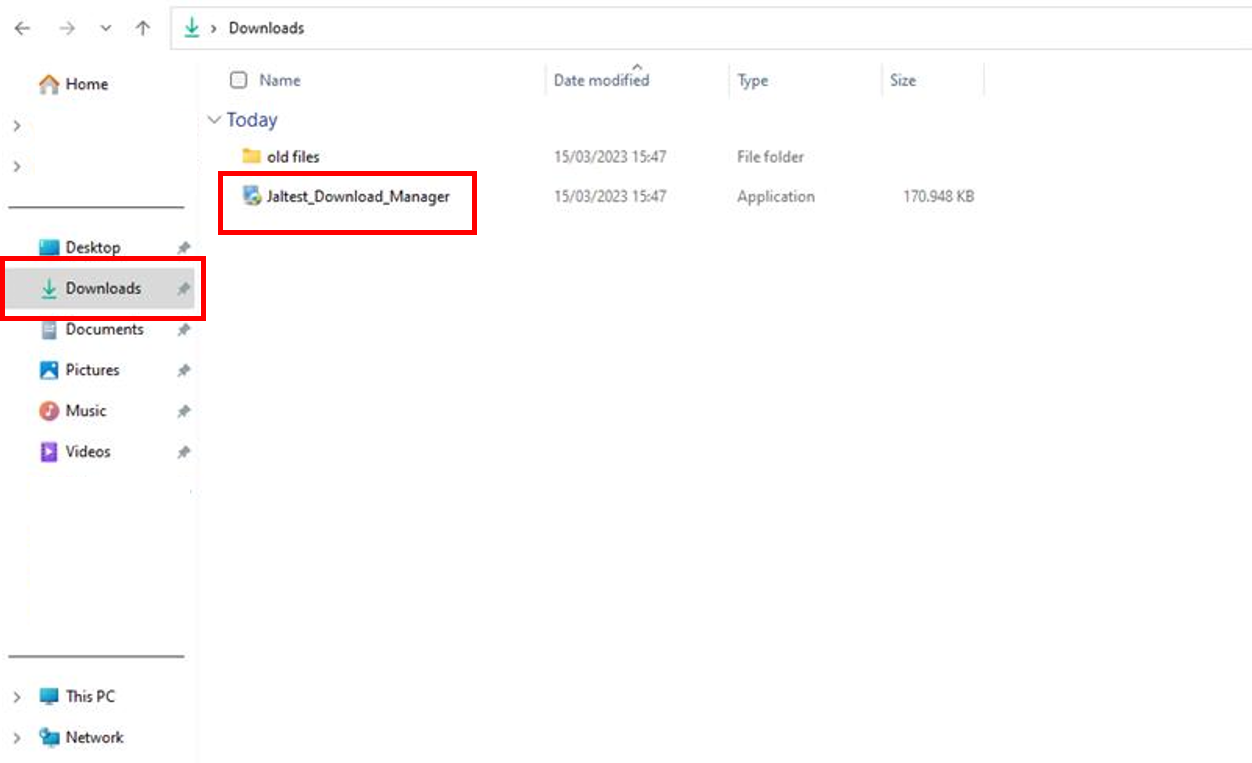
4. Once you get the "Download Manager"
- Go to Downloads on your laptop. Right-click on it and select "Run as Administrator" and follow the prompts to start the download.
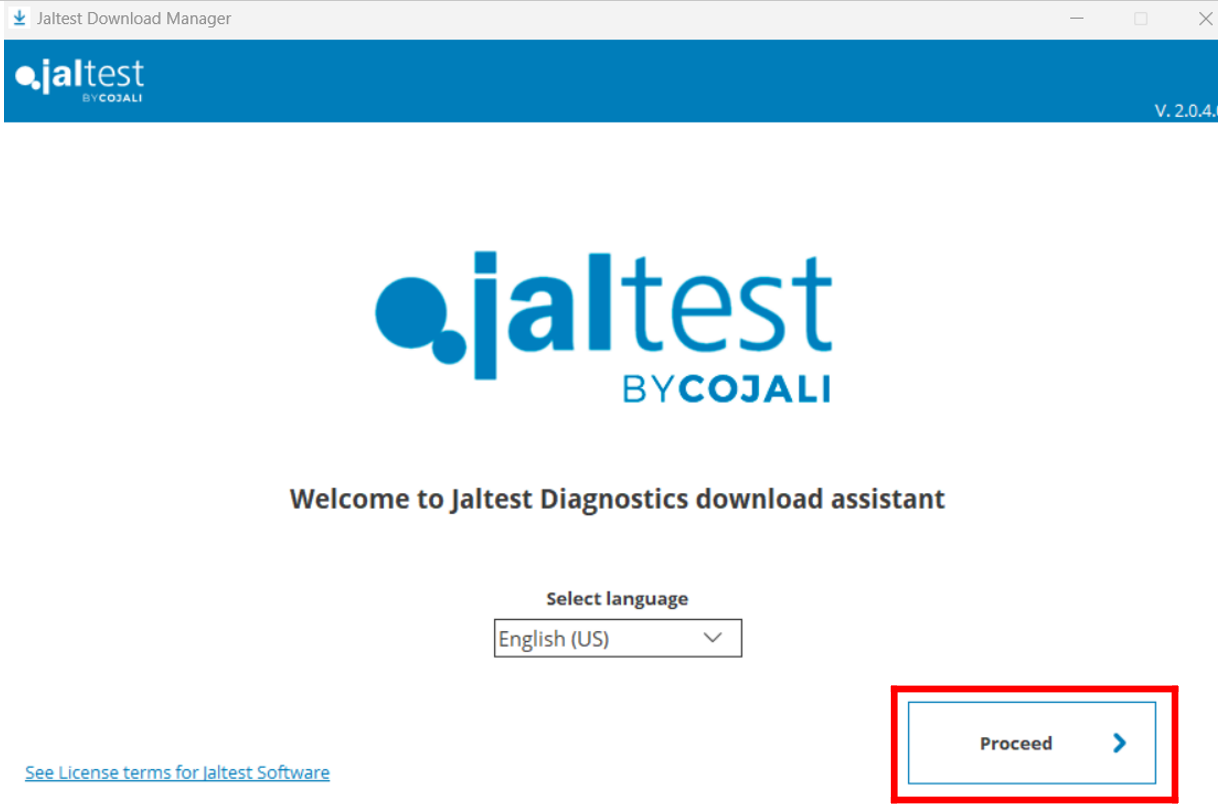
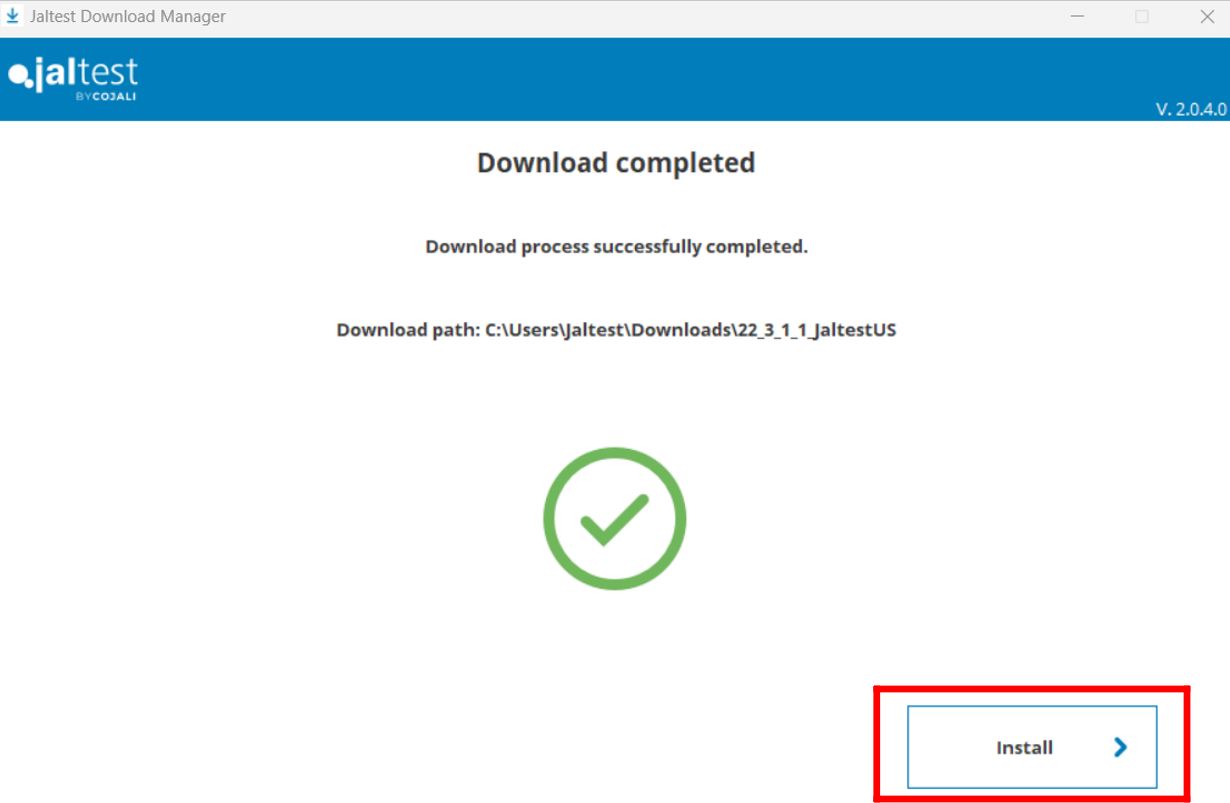
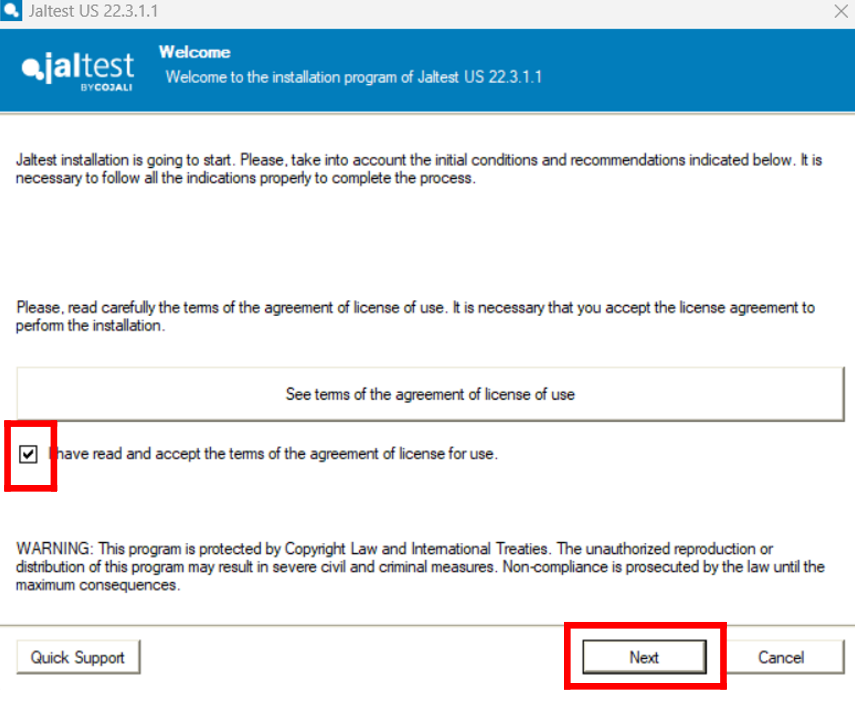
5. Once the software is downloaded, click "Install" to start the installation process
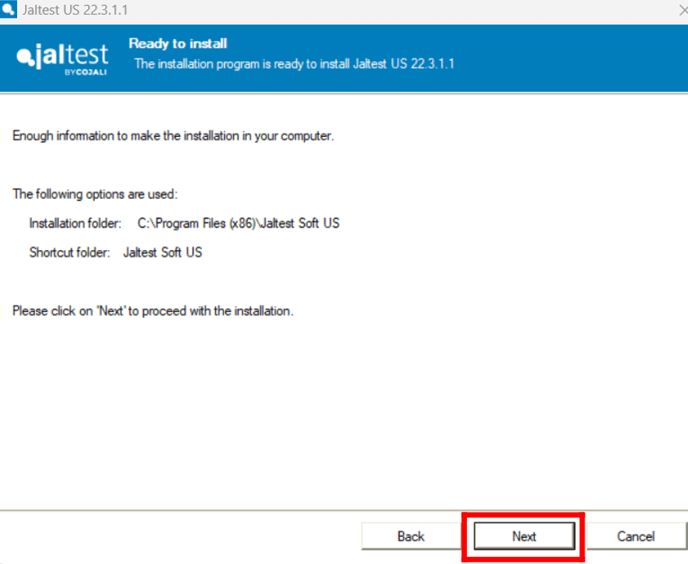
6. Follow the prompts by checking the boxes and clicking next.
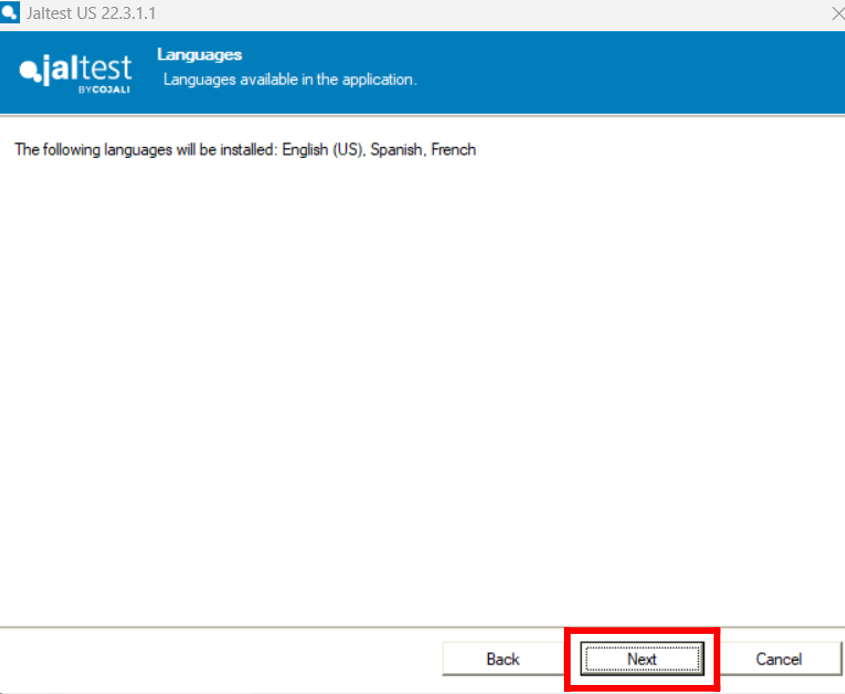
7. Click next to all prompts in the installation setup.
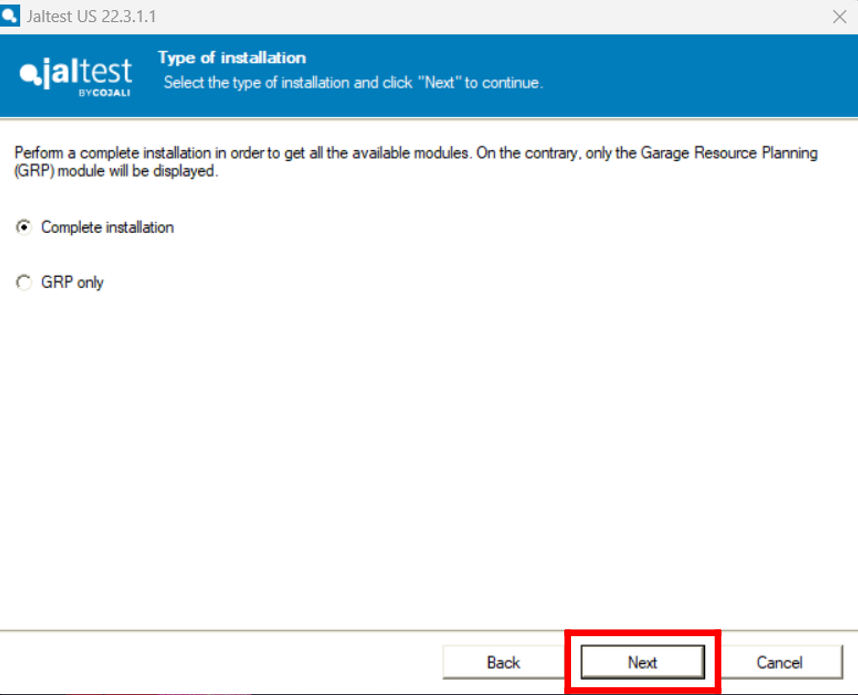
8. Select "Complete Installation"
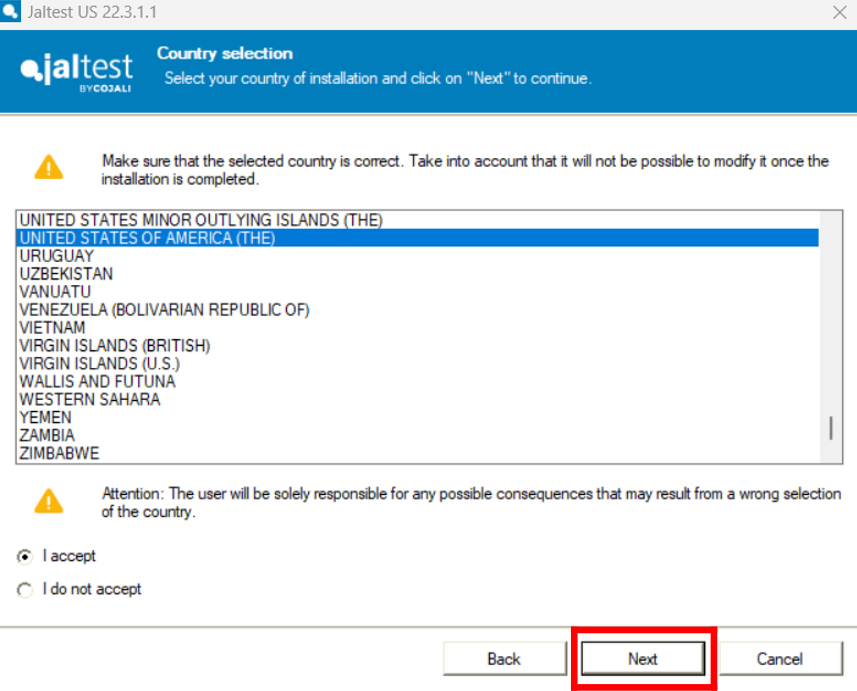
9. Select your country of installation and click "Next" to all prompts to continue.
10. Accepts "Terms and conditions" then select " I am already a Jaltest user" and use your login information for Jaltest.com "Client Area"
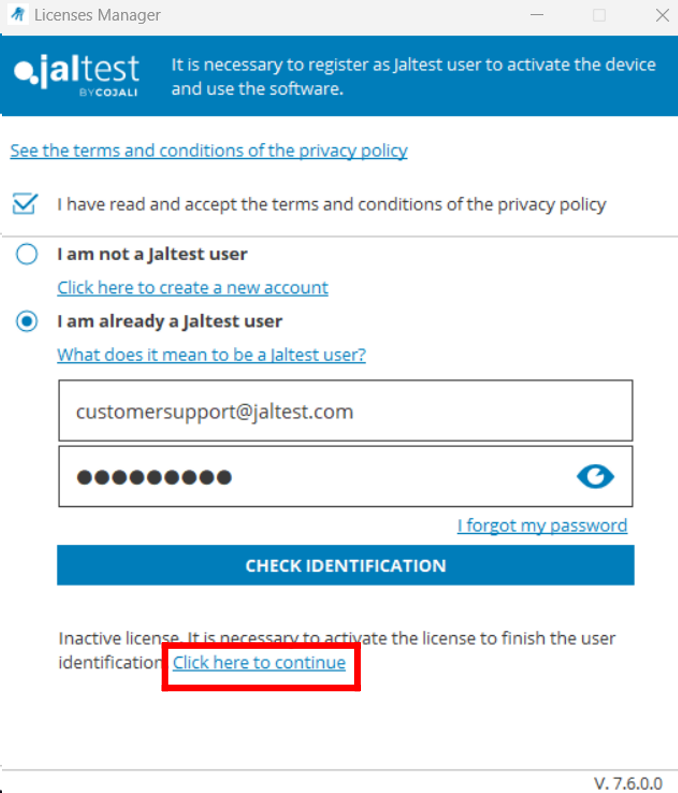
11. Click "Activate License". Once it activates the license the software configuration will start.
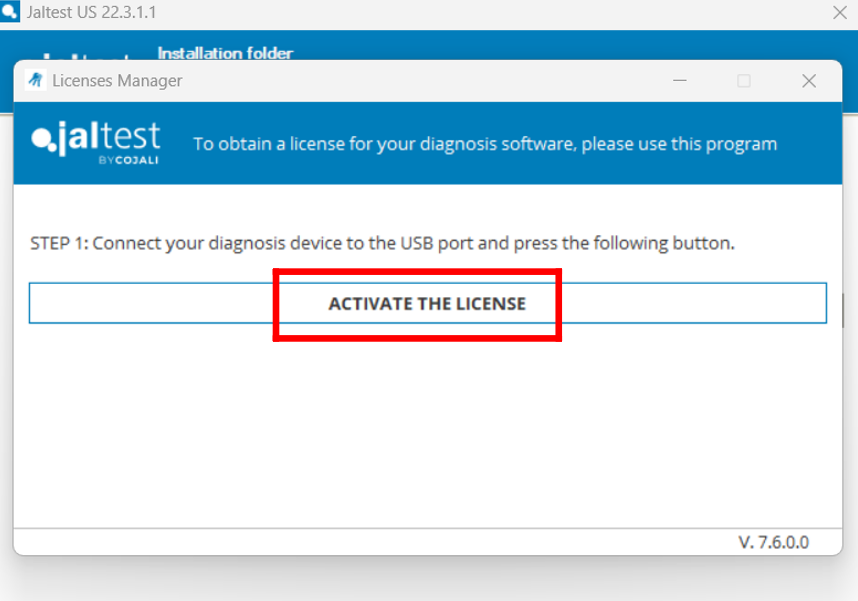
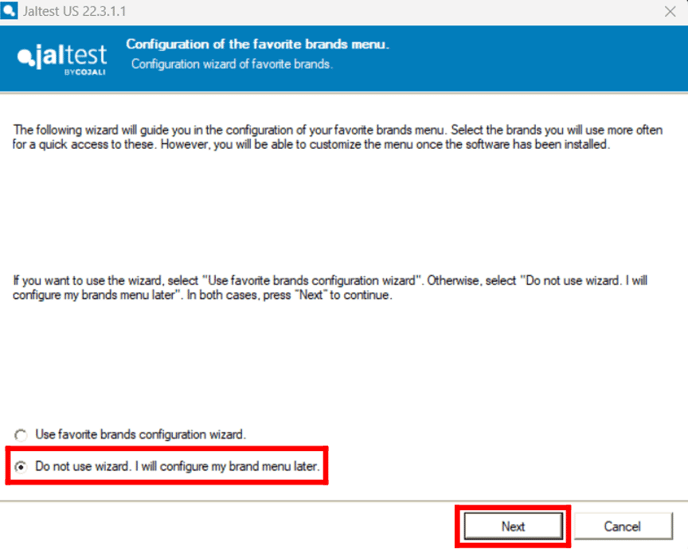
12. Leave the Jaltest link plugged in by USB to the laptop with access to the internet so your unit will be configured properly. Once the configuration has been performed, you can just select "Do not use wizard"
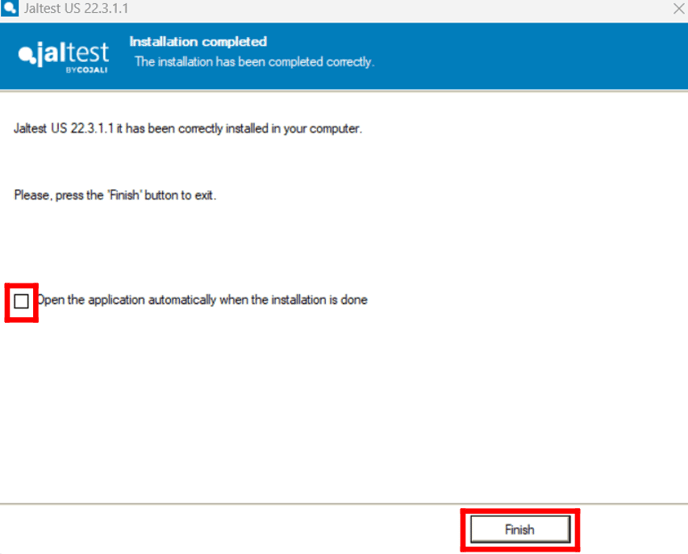
13. Check the box and hit "Finish" and you have installed the software.
14. You are all set and can start using the device! however, before using it, make sure you set up your Expert Mode as well so you can do Regens, Parameter changes, Calibrations, and more!
- Use this article for help to set up "Expert Mode"
HOW DO I GENERATE EXPERT MODE?
Remember that to access certain technical support functions a Jaltest ATS license is required.
We have officially rolled out our Advanced Technical Support (ATS). You may want to inquire about this high-level and valuable technical expertise support from our Jaltest Diesel Technicians!
Check these articles for information: